The Injection Process in Poured Foundation Repair
At SEALED there are several important steps we take when we prepare and then inject a crack with polyurethane. As a foundation contractor, we take pride in ensuring that our repair procedures will solve your foundation problems.
First, we seal the visible crack in the interior of the home, with a cap of two-part epoxy. When mixed together, it is spread across the crack with a spatula or putty knife and after curing for one hour, it provides a rock hard seal.
Second, we embed fiberglass based Fibatape between the layers of epoxy. It strengthens the seal and allows us to use less epoxy, reducing the cure time.
Third, as we apply the epoxy we place small plastic ports about every six to eight inches directly over the crack so that the polyurethane will spread across the entire length of the crack during the injection.
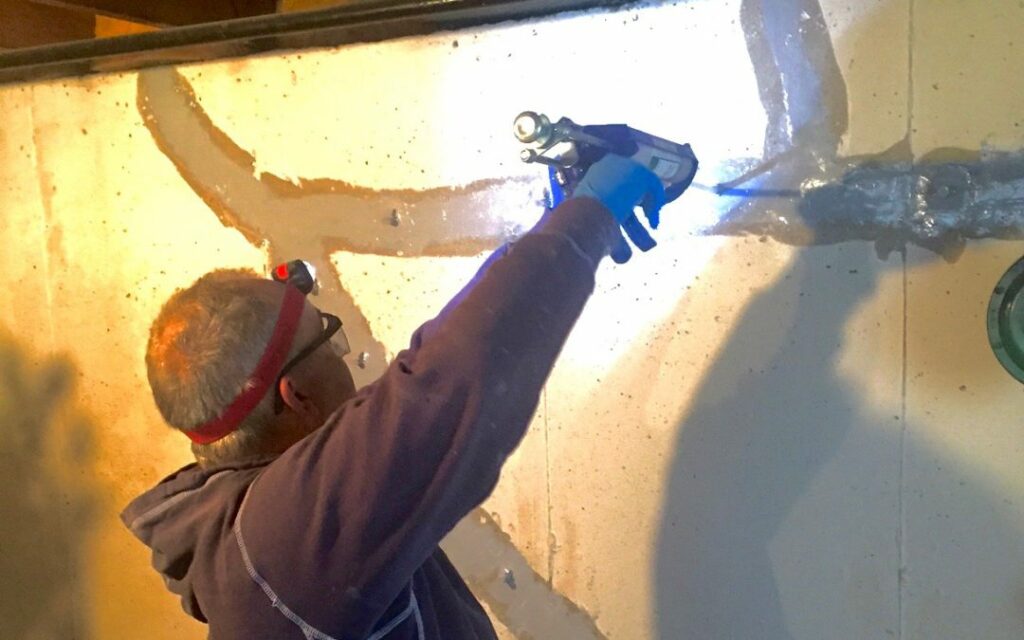
Fourth, we fill one of the two cartridges used in our caulk gun with water, which will mix with the polyurethane in a special nozzle as we inject.
Fifth, we start at the very bottom port and work our way up the wall. The polyurethane and water mix in the long nozzle and immediately begins to expand. As we inject the lowest port we watch carefully for the polyurethane to appear the next port above. That tells us that this part of the crack has been filled with the expanding polyurethane and we can move to the next highest port.
Finally, as we remove the nozzle from the port we attach a small plastic plug, so that polyurethane does not come back out of the port and spread onto the wall or floor.
The polyurethane expands within the crack and cures very quickly, preventing moisture or rain from coming into the home almost immediately. No more leaks.